How to move files or workouts to other folders in TrainerPlan
On trainerplan, Organizing your workouts or files in folders is a great way to keep your workspace clean and accessible. In this article we will teach you step by step how to move one or more workouts or files from one folder to another.
Steps to move files or workouts
1. Access your training library or files
Sign in to your TrainerPlan account and go to the section where you save your workouts or files.
2. Select the files or workouts you want to move
- To select an individual file or training, click on it.
- If you want to move multiple files or workouts at once, just do a multiple selection using the boxes before the file name or workout.

3. Click on the “Move” option
Once you have selected the files or workouts, you will see the option “Move” on the top toolbar. Click this option.

4. Choose the destination folder
A dialog box will appear with the available folders in your library. Select the folder to which you want to move the files or workouts. If you need to create a new folder, you can also do it from this box.
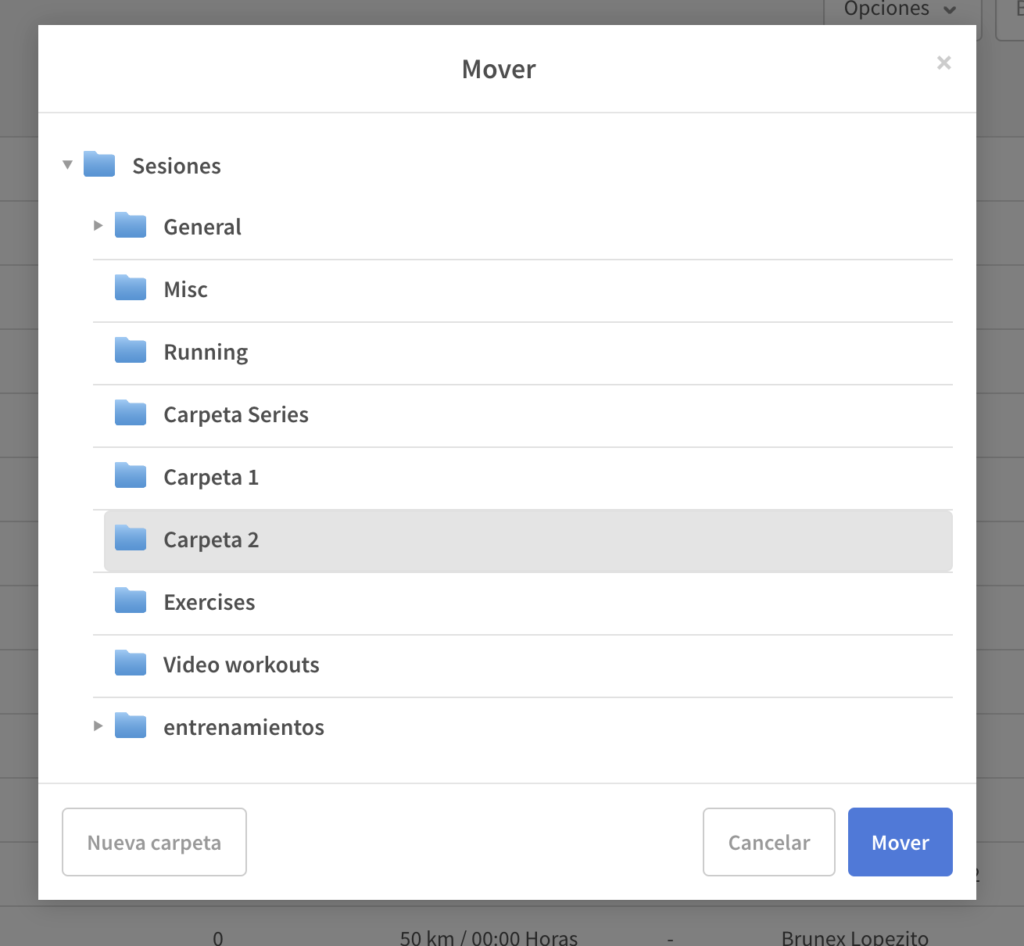
5. Confirm the action
After selecting the destination folder, click the button “Move” to confirm the action. The selected files or workouts will be moved to the chosen folder.
IMPORTANT NOTES
• If a training or file is already assigned to an athlete or program, moving it from the folder will not affect its availability for the athlete.
• Organize workouts in folders is an effective way to prepare specific programs or keep a clean history of your workouts.
Do you have more doubts?
If you have any additional problems or questions about how to organize your files and workouts in folders, do not hesitate to contact us through the technical support of trainerplan or consult our Help Center.