How to add and manage your fitness metrics in TrainerPlan
With the new functionality of Fitness metrics From TrainerPlan, you can register and monitor several key indicators that will help you evaluate your fitness and progress over time. This article will guide you step by step to add and manage these metrics.
Metrics available on TrainerPlan
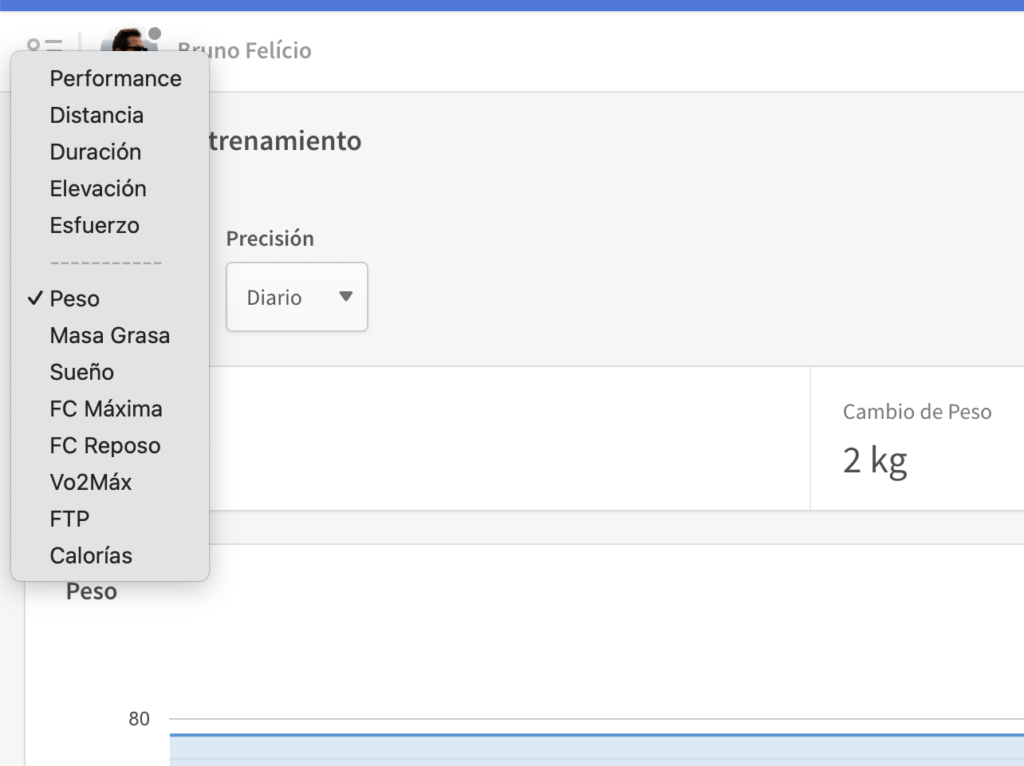
TrainerPlan allows you to register and track the following metrics in fitness:
• Weight: Measures body weight.
• fat mass: The percentage of body fat relative to the total weight.
• Dream: Records the number of hours of sleep to assess recovery.
• maximum HR: The maximum heart rate reached during workouts.
• fc rest: Heart rate at rest, a key indicator of general fitness.
• VO2max: The maximum volume of oxygen that the body can process, key to measuring aerobic capacity.
• ftp: Functional power threshold, important for cyclists and endurance athletes.
• calories: The total number of calories burned during training sessions.
How to add fitness metrics to your calendar
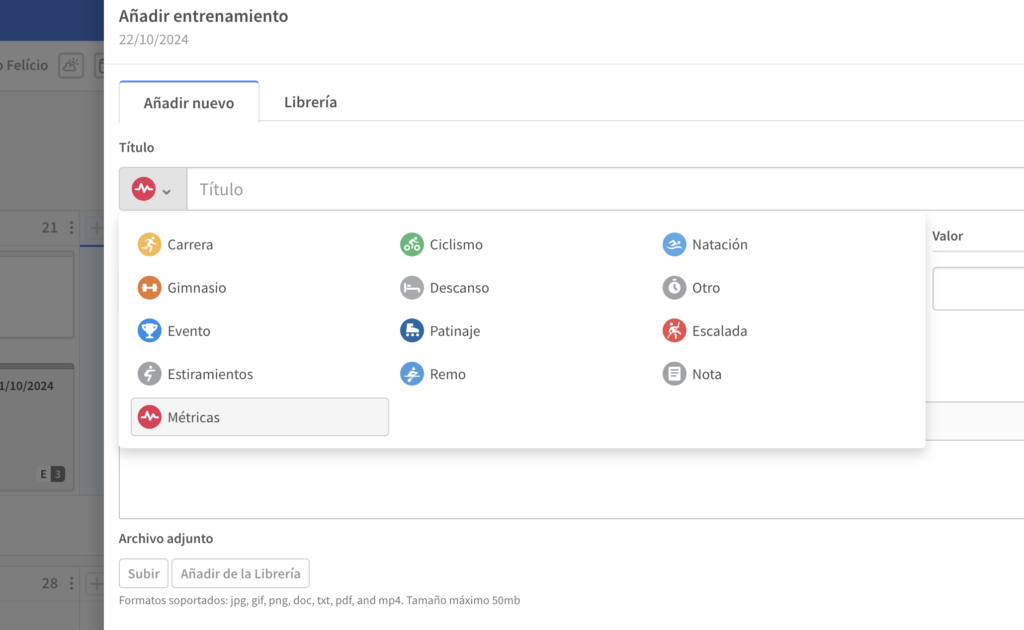
1. Access your training calendar: From the TrainerPlan home page, go to the “Calendar” section. Here you will see your training sessions organized per day.
2. Select the day: Click on the day where you want to add the metrics. If you already have a scheduled training session, you can add the metrics next to it.
3. Add a metrics card: Click the “+” button and select “Metrics”. A drop-down menu will appear where you can choose the type of metric you want to register (such as weight, fat mass, etc.).
4. Enter your data: Enter the values corresponding to each metric you want to register. For example, if you weigh 78 kg and have a fat mass of 12%, you only have to fill those fields.
5. Save the changes: Once you have entered your metrics, click “Save”. The metrics will be registered in your calendar and you can consult them at any time.
Access the metrics history from the athlete’s dashboard
In addition to registering and displaying your daily metrics in the calendar, TrainerPlan allows you to access the Metrics history directly from the Athlete board. In this section, you will be able to see a graph with the evolution of each metric over time, which facilitates detailed monitoring of your progress.
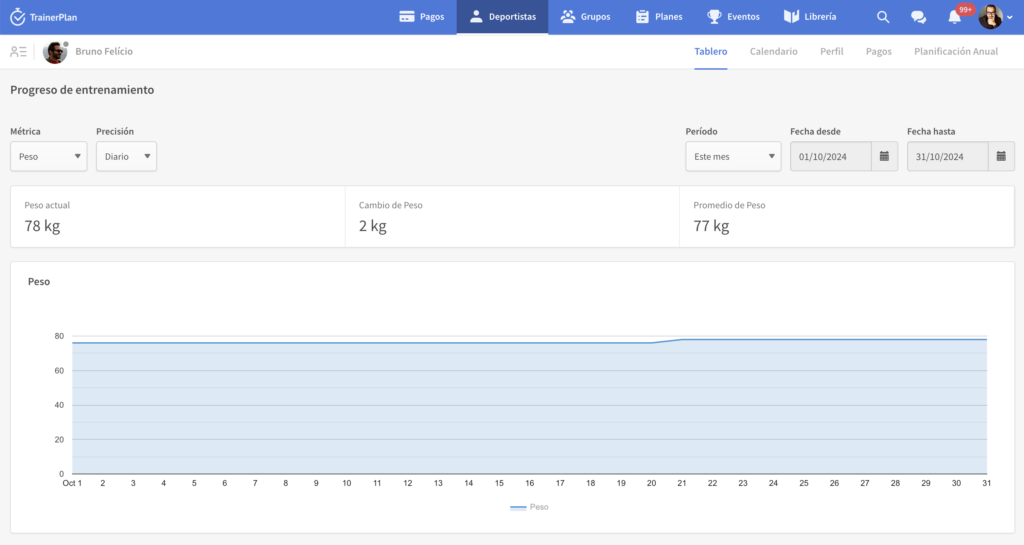
1. Access the athlete’s board: From the top bar, select the “Dashboard” tab.
2. Select the metric: On the board, in the left dropdown, choose the metric you want to analyze (weight, fat mass, calories, etc.) and choose the period of time you want to visualize.
3. Check your evolution: You will be able to see the evolution of your selected metric throughout the chosen period, with graphs that reflect the changes and key statistics such as the average weight and the total change during that period.
Tips to maximize the use of your metrics
• consistent record: Try to record your metrics at the same time each day or week to get more accurate data and avoid normal fluctuations.
• Training setting: Use the metrics to adjust your training sessions. If you see that your weight or fat mass doesn’t change as you expected, consider adjusting your routine or diet.
• Check with your coach: If you have a trainerplan trainer, you will be able to see your metrics and provide you with personalized recommendations.
Frequently Asked Questions
Can I edit a metric after saving it?
Yes, you can edit any registered metrics. Just click on the metric within the calendar and modify the data.
Can I delete metrics for a specific day?
Yes, you can delete a metric by clicking on the three dots next to the metrics card and selecting “Delete”.
Is it necessary to add all available metrics?
No, you just need to add the metrics that are relevant to your tracking. You can start with a few and add more as you need them.